
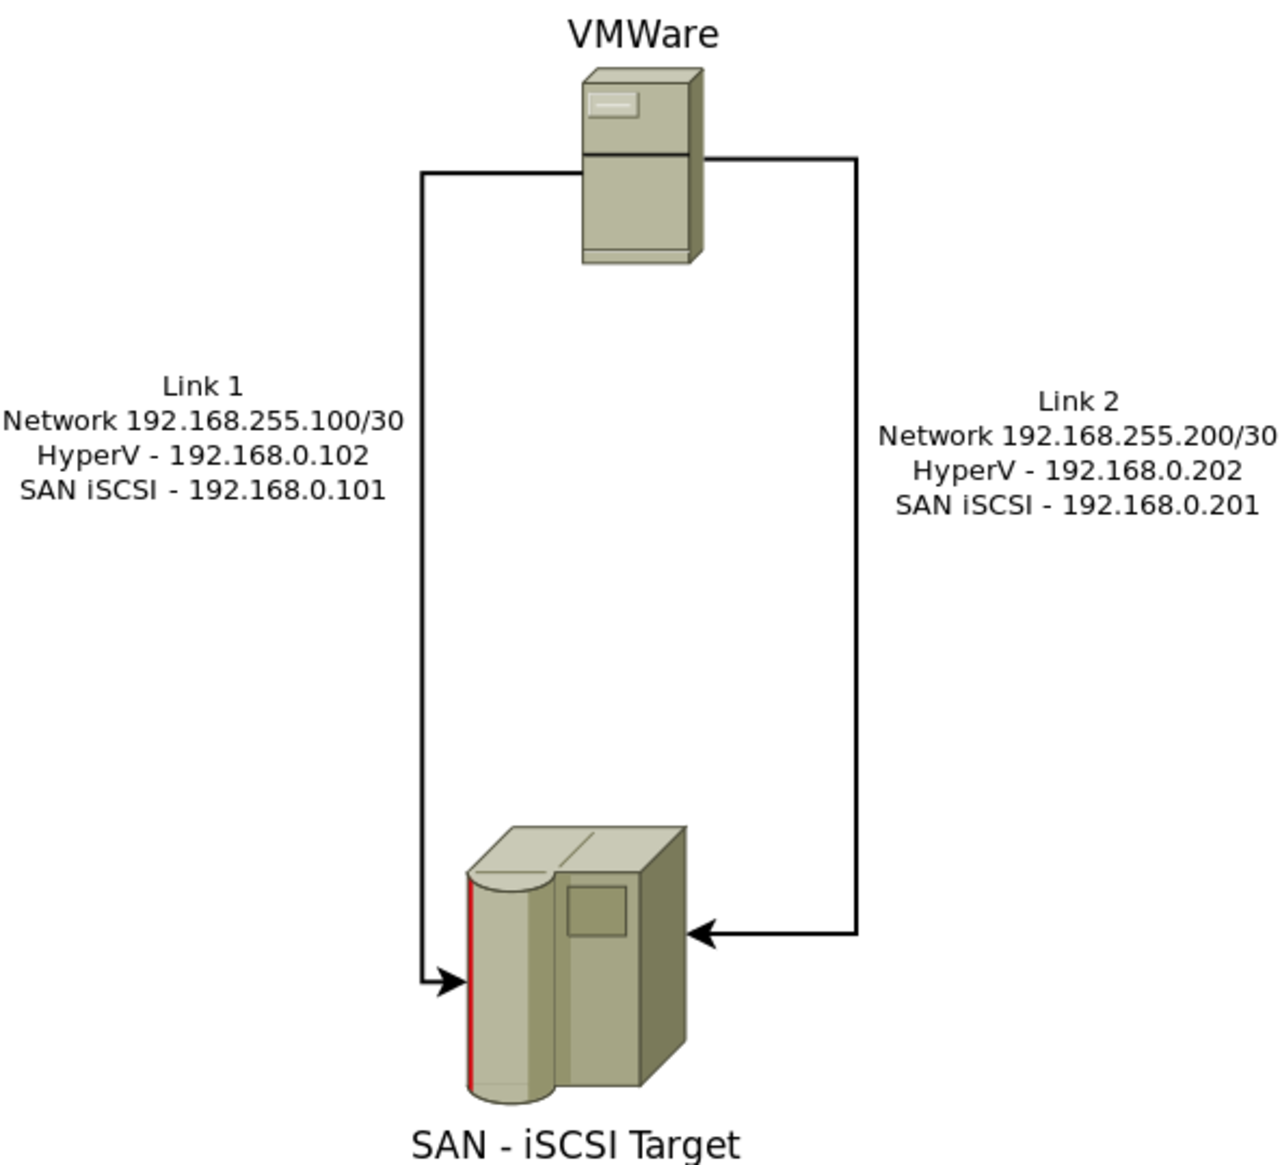
I recently set up an iSCSI SAN for use with VMWare Server. The set up was basically a Linux Ubuntu Server target with 2 network links to a single VNWare Server as the integrator. I also included iSCSI multi-pathing by enabling it on the initiator (VMWare Server).
This is how I set up an Linux SAN Target with iSCSI, interfacing with VMWare 5.1. as the iSCSI Initiator.
Part 1: Setting up our iSCSI Target with Linux
- Let’s set up our network interfaces that will be used for the SAN connection.
vi /etc/network/interfaces
#closed circuit storage network
auto eth0
iface eth0 inet static
        address 192.168.255.101
        netmask 255.255.255.252

auto eth1
iface eth1 inet static
        address 192.168.255.201
        netmask 255.255.255.252
I chose two separate /30 networks. If you remember a /30 only has 2 usable host IPs. This ensures that our iSCSI Target and Imitator are the only IPs on the network. No use in using a larger network, as it will be wasted with our Point-to-Point Ethernet link.
- Creating LUNs. I decided to use a flat file for my LUN images. You can use other storage devices, such as a /dev/sdX devices,etc. I just thought it would be easier to keep track of the LUNs if they were files…not sure if this is best practice…anyway!
mkdir LUNs
cd LUNs
dd if=/dev/zero of=LUN02.img bs=1024k count=10000

10000+0 records in
10000+0 records out
10485760000 bytes (10 GB) copied, 103.744 s, 101 MB/s
This will create a zero’d LUN01.img file with the size of 10GBs
- Prepare the LUN, and partition it.
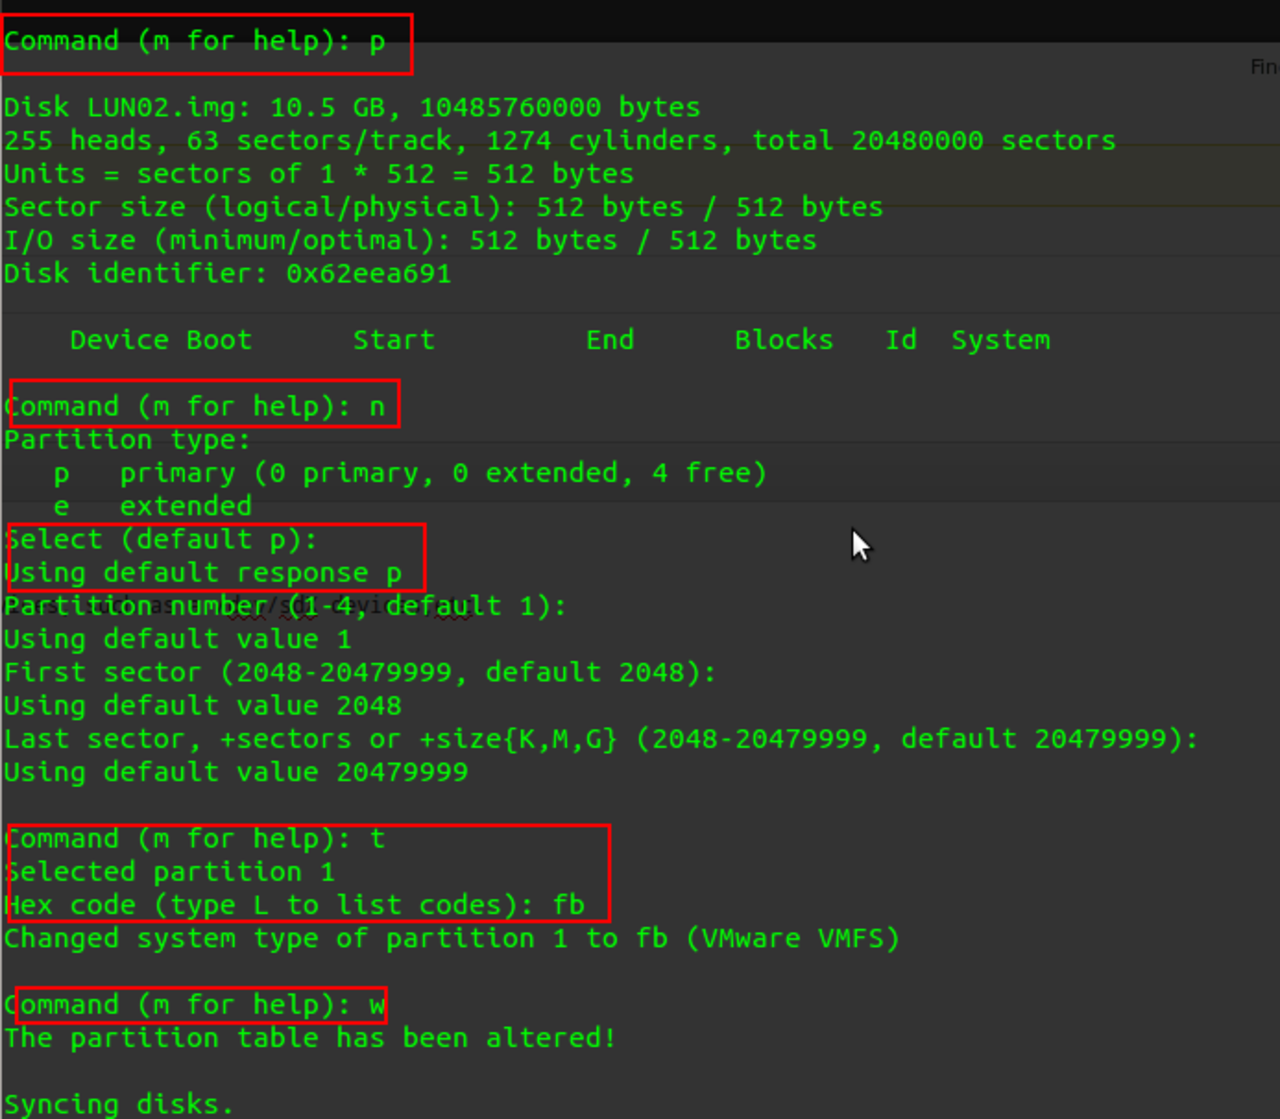
fdisk LUN01.img
Create a new partition 1, type fb (VMFS)

- On the iSCSI target, install the following packages:
apt-get install iscsitarget iscsitarget-dkms
This will install the necessary packages to run the iSCSI target service. Also install the following packages for troublshooting purposes. These packages can be used to impersonate an iSCSI initirator connection.
apt-get install open-iscsi open-iscsi-utils
- Start the iSCSI Target service and make sure it starts successfully.
/etc/init.d/iscsitarget start
- Edit the ietd.conf file to identify the LUNs you will advertise.
vi /etc/ietd/ietd.conf Target iqn.2001-04.com.example:storage.lun01 Lun 0 Path=/{mount_location}/LUNs/LUN01.img,Type=fileio Alias LUN01 - Restart the iSCSI Target Service:
/etc/init.d/iscsitarget restart
Part 2: Setting up VMWare ESXi 5.1
- Assuming you have installed VMWare and have two(2) Ethernet interfaces to use to hook into a SAN network. We will start by setting up the Network Adapters.
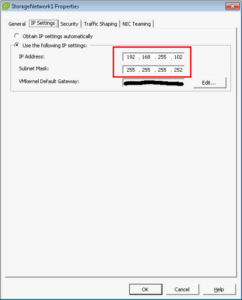
IP the two(2) Ethernet Network Adapters
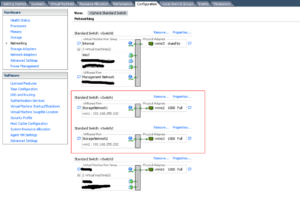
(Do this for both Network Adapters) - You should now see a iSCSI Storage Adapter Available.

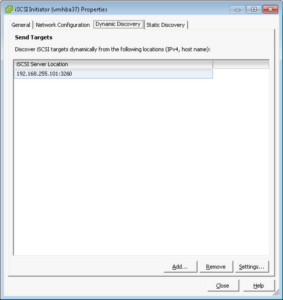
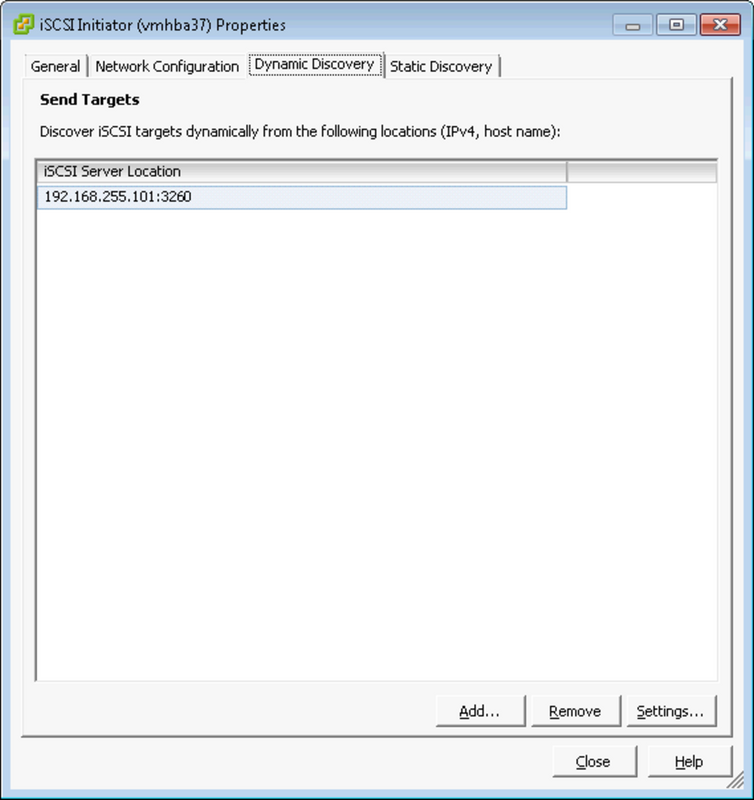
- Right-Click on the iSCSI Adapter and go to Properties. Here we have to set the iSCSI Discovery Address.
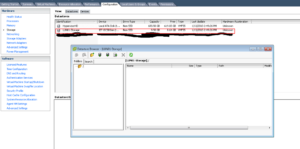
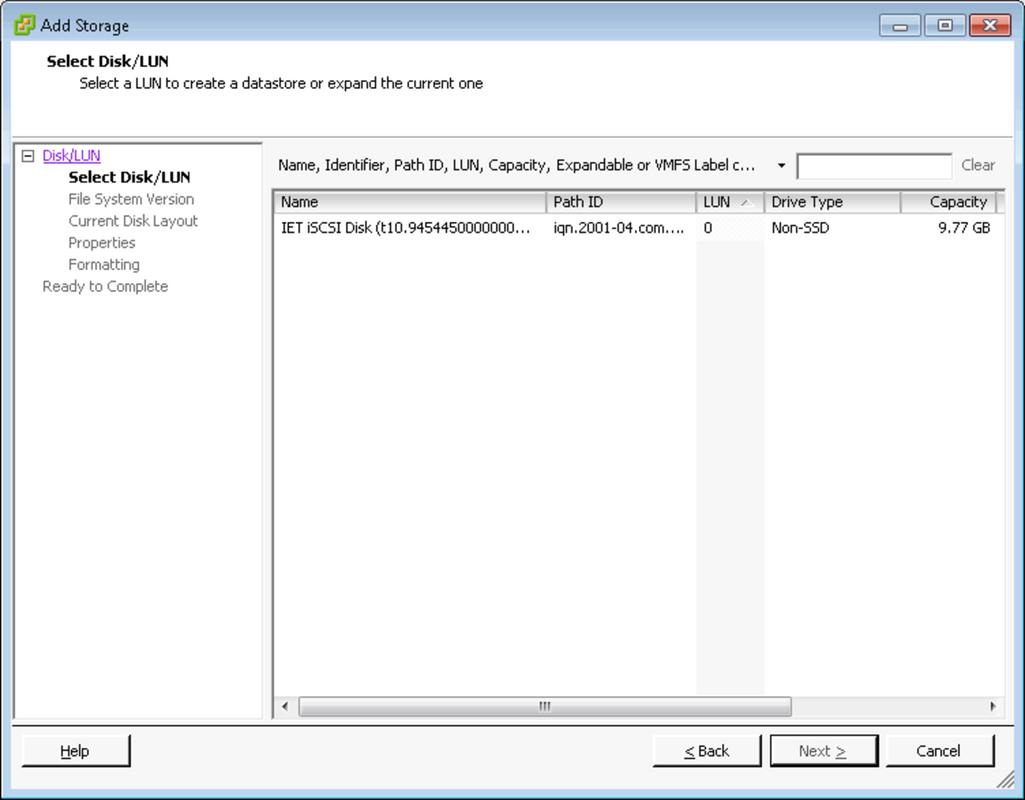
- Click on the iSCSI Adapter, you should see in the bottom pane the LUN being advertised by our iSCSI Target.
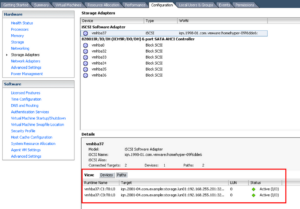
NOTICE: We have 2 paths going to our LUN?? (This is a good thing! We have to set up multipathing…but later!) - Provision the LUN Storage to be used with VMWare.
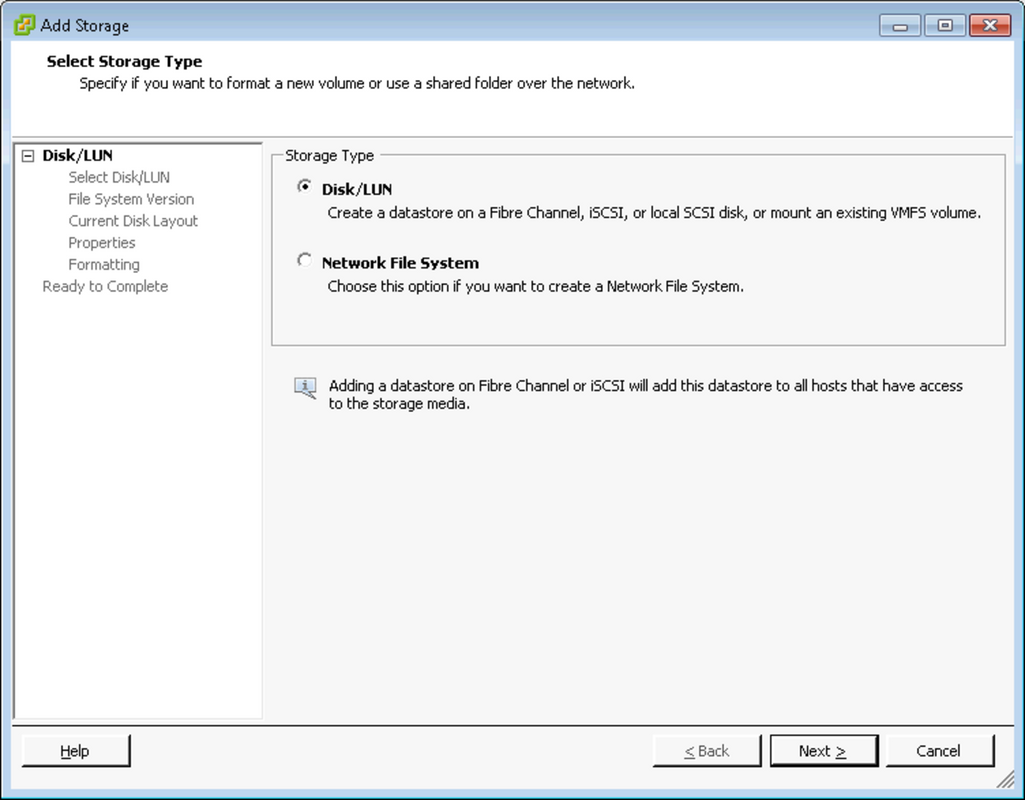
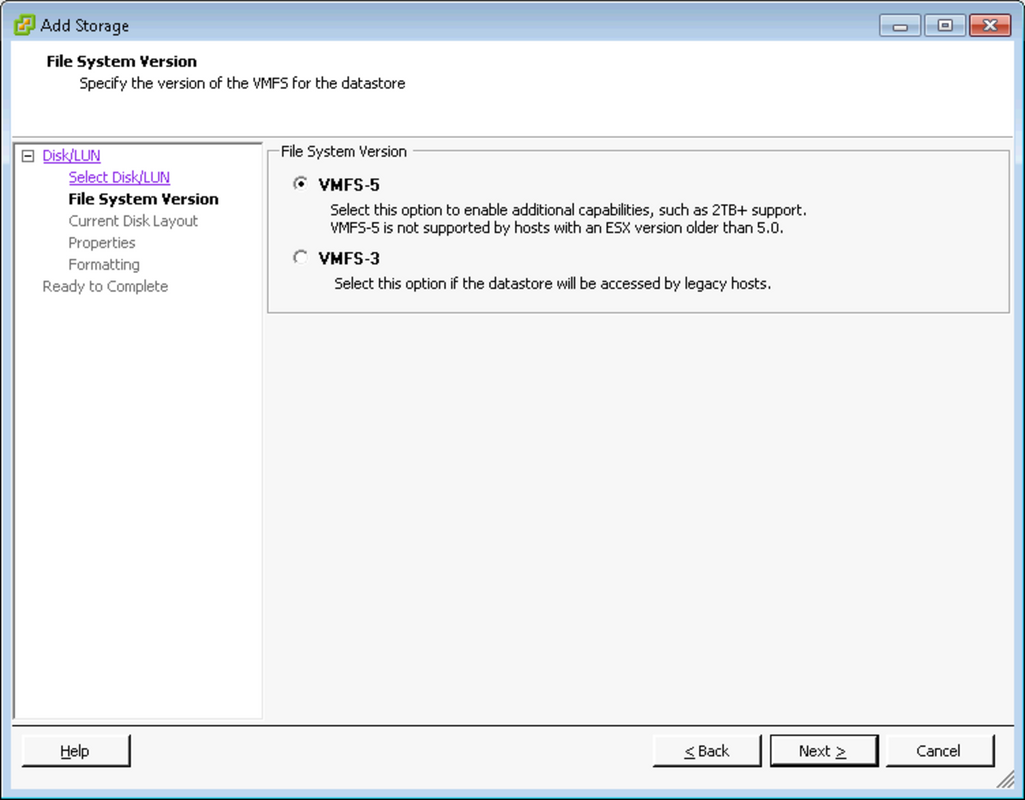
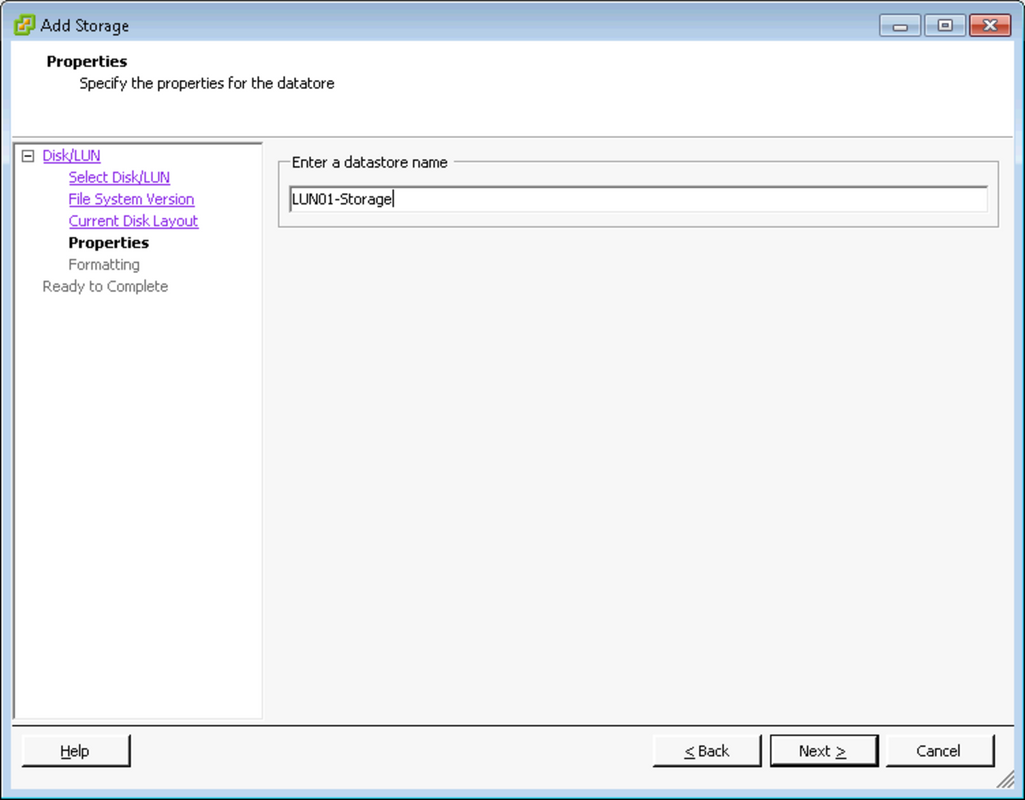
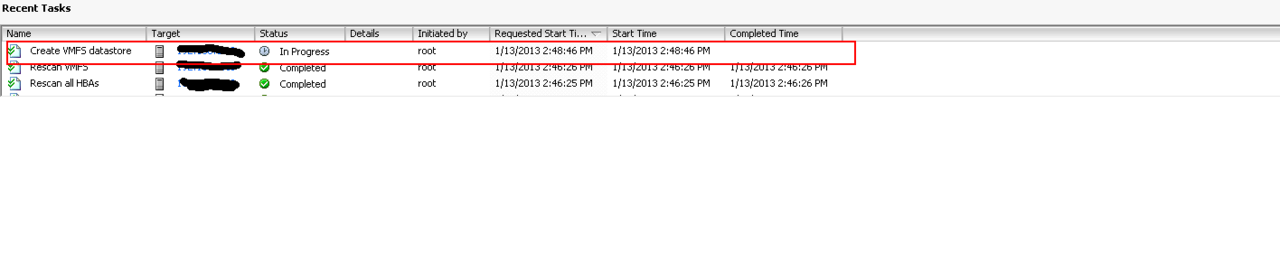
Under Storage, click on the far Right the “Add Storage” Link and follow the following prompts to provision the LUN for use with VMWare.
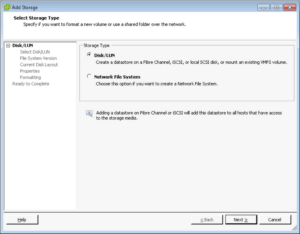

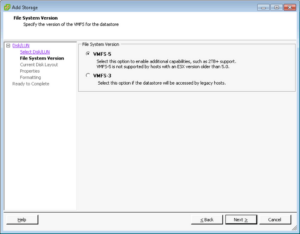

Wait for the drive to be provisioned.

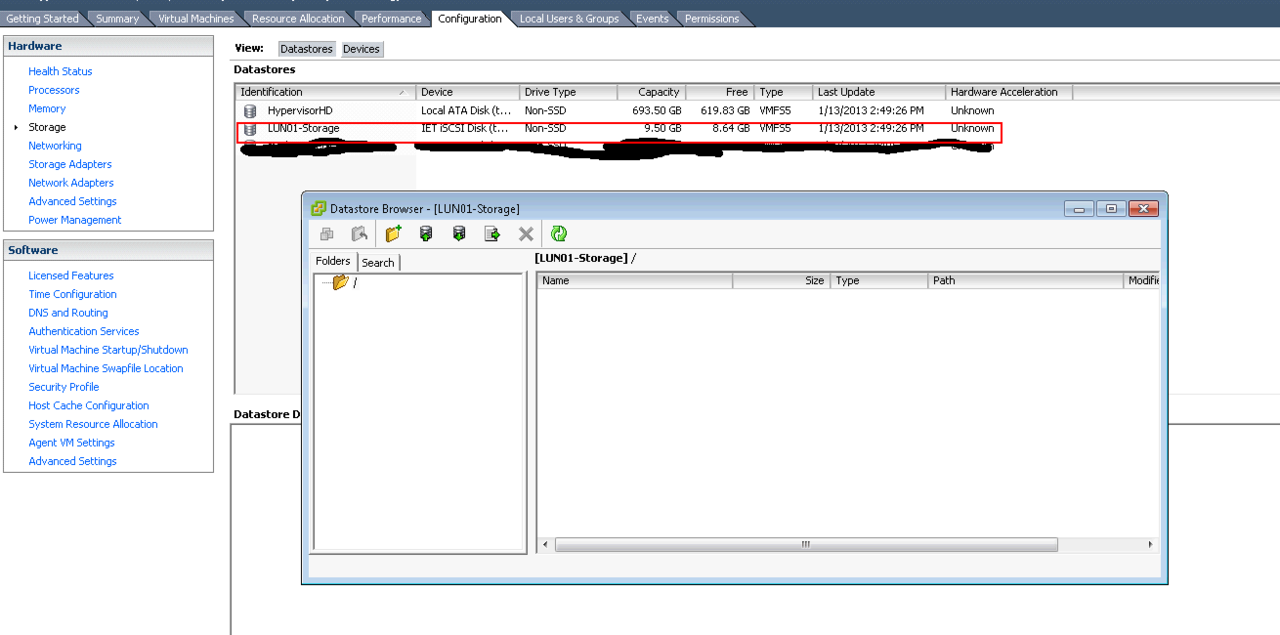
- You should now have a Storage LUN available for use with VMWare.
- Set up Mutlipathing..
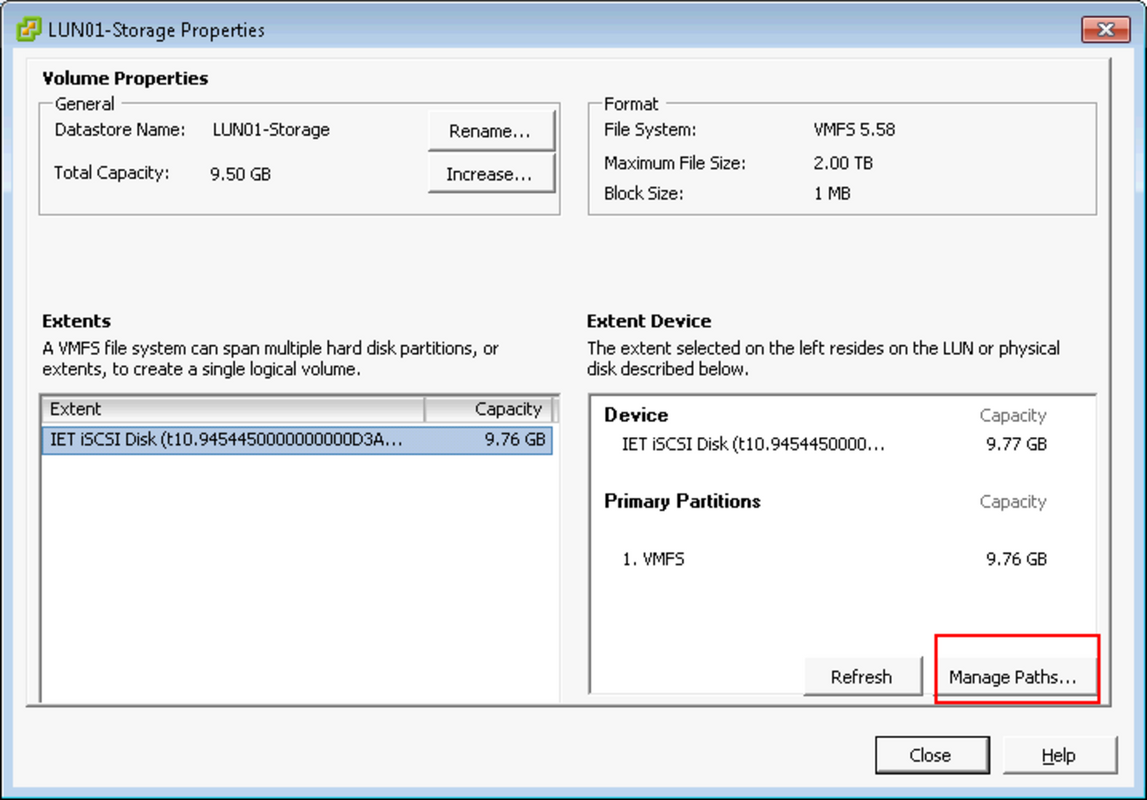
Click on the LUN under Storage. Right Click and go to Properties.
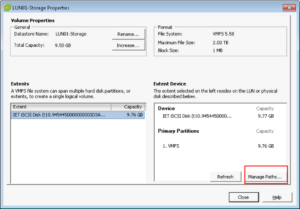
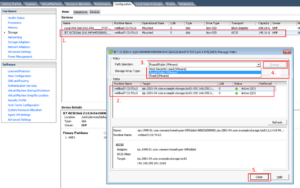
Next, click on Manage Paths.Click on Manage Paths, in the following prompt, change


Part 3: Limiting iSCSI Access
You can limit the access of the iSCSI connection by editing the initiator.allow and/or targets.allow.
- Edit the initiators.allow, this file limits the allowed initiators by either their IQN, IP, or IP Subnet.
vi /etc/ietd/initiators.allow
ALL ALL
- Edit the targets.allow, this file limits the allowed targets. (I’ve limited to the follow IPs so the only IPs used on the Target to those that are part of the Multipathing that we set up from above.)
vi /etc/ietd/targets.allow
#storage networks /30s
ALL 192.168.255.101,192.168.255.201
Source:
VMware hyper-V, is that like IBM Apple?
Haha, you are correct sure. Fixed the title. Thanks!
Do you use such configurations for production use or just testing/playing?
Hi Kevin, this paticular setup was put together for this Post. However, I did use open-iscsi as a SAN iSCSI backend to host this site!! I’ve recently moved to FiberChannel because I was able to obtain a few FiberChannel HBAs. See https://infotechguy.net/linux-fibre-channel-scsi-target-using-scst/